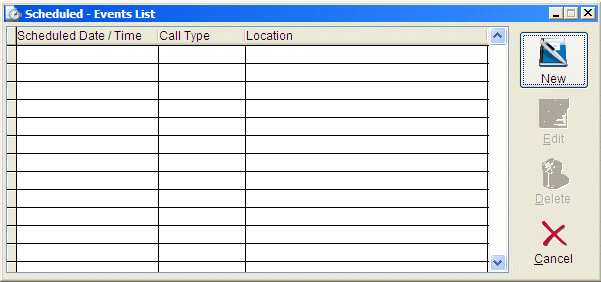
Scheduled events will be displayed in date/time order with the events that are scheduled to activate soonest at the top of the list.
At times it is necessary to schedule an event to be created at a specific date and time. Crimestar CAD allows you to create a virtually unlimited number of scheduled events. To create a scheduled event click on the “Schedule a New Event” button located in the lower right corner of the Call Taker – Event Form. This will activate the Scheduled - Events List form. This form will show you a list of all events that have already been scheduled and allow you to either create a new scheduled event, edit an existing scheduled event or delete a scheduled event.

Scheduled events will be displayed in date/time order with the events that
are scheduled to activate soonest at the top of the list.
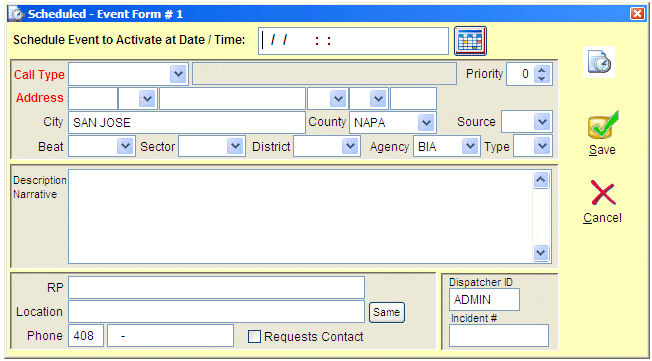
To create a new scheduled event click on the NEW button on the Scheduled Events List Form. This will activate the scheduled event form and allow you to enter an event. The design and layout of this form is very similar to that of the Call Taker – Event form, however on a scheduled event, no Event #, Event Date/Time or Event Disposition information is captured. The Event # and Event Date/Time will be created when the scheduled event becomes active. Likewise the event disposition information will be captured one the scheduled event has become active and is being closed out from the active events queue.
The scheduled event form utilizes a Scheduled Date/Time field to indicate when the event is to become an active event in CAD.

To Edit an event select the event from the scheduled events list and click
“Edit”. This will activate the scheduled event form and allow you to make
any necessary changes.
To Delete an event select the event from the scheduled events list and click “Delete”. The system will prompt you to confirm that you want to delete the event. Once confirmed the deleted event is removed from the scheduled events queue.